
Centos7下cobbler安装及配置
Centos7 下cobbler安装及配置
1、背景介绍
作为运维,在公司经常遇到一些机械性重复工作要做,例如:为新机器装系统,一台两台机器装系统,可以用光盘、U盘等介质安装,1小时也完成了,但是如果有成百台的服务器还要用光盘、U盘去安装,就显得有些力不从心了。PXE技术就能很好的解决这个问题,本文将会对PXE的工作原理有所介绍,而cobbler则是基于PXE技术的工作原理的二次封装,通过命令的方式简化了PXE配置过程。
2、PXE原理介绍
事实上把PXE称作是一种引导方式而不是安装方式似乎更加准确,PXE(Pre-boot Execution Environment)是由Intel设计的协议,它可以使计算机通过网络启动,但是有一个前提条件是计算机的网卡必须具有引导功能,这个网卡中要有一个PXE客户端。当计算机POST自检成功以后,BIOS把网卡中ROM的PXE客户端调入内存执行,PXE客户端通过网络中的DHCP服务器获取一个IP地址,拿到IP地址以后PXE继续引导计算机与网络中的TFTP客户端建立连接,从而从TFTP服务器中获取开机引导文件之后请求并下载安装需要的文件。在这个过程中需要一台服务器来提供启动文件、安装文件、以及安装过程中的自动应答文件等。
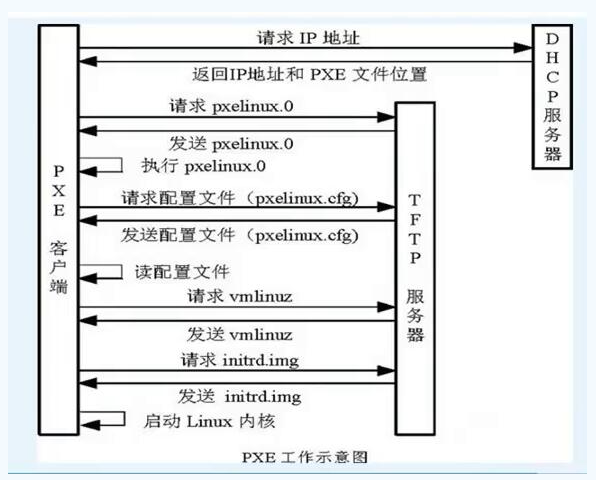
原理介绍
- Client向PXE Server上的DHCP发送IP地址请求消息,DHCP检测- Client是否合法(主要是检测Client的网卡MAC地址),如果合法则返回Client的IP地址,同时将启动文件pxelinux.0的位置信息一并传送给Client
- Client向PXE Server上的TFTP发送获取pxelinux.0请求消息,TFTP接收到消息之后再向Client发送pxelinux.0大小信息,试探Client是否满意,当TFTP收到Client发回的同意大小信息之后,正式向Client发送pxelinux.0
- Client执行接收到的pxelinux.0文件
- Client向TFTP Server发送针对本机的配置信息文件(在TFTP服务的pxelinux.cfg目录下,这是系统菜单文件,格式和isolinux.cfg格式一样,功能也是类似),TFTP将配置文件发回Client,继而Client根据配置文件执行后续操作。
- Client向TFTP发送Linux内核请求信息,TFTP接收到消息之后将内核文件发送给Client
- Client向TFTP发送根文件请求信息,TFTP接收到消息之后返回Linux根文件系统
- Client启动Linux内核
- Client下载安装源文件,读取自动化安装脚本
3、Cobbler
3.1、Cobbler介绍
Cobbler是一个Linux服务器快速网络安装的服务,由python开发,小巧轻便(15k行python代码),可以通过PXE的方式来快速安装、重装物理服务器和虚拟机,同时还可以管理DHCP,DNS,TFTP、RSYNC以及yum仓库、构造系统ISO镜像。
Cobbler可以使用命令行方式管理,也提供了基于Web的界面管理工具(cobbler-web),还提供了API接口,可以方便二次开发使用。
3.2、Cobbler工作流程
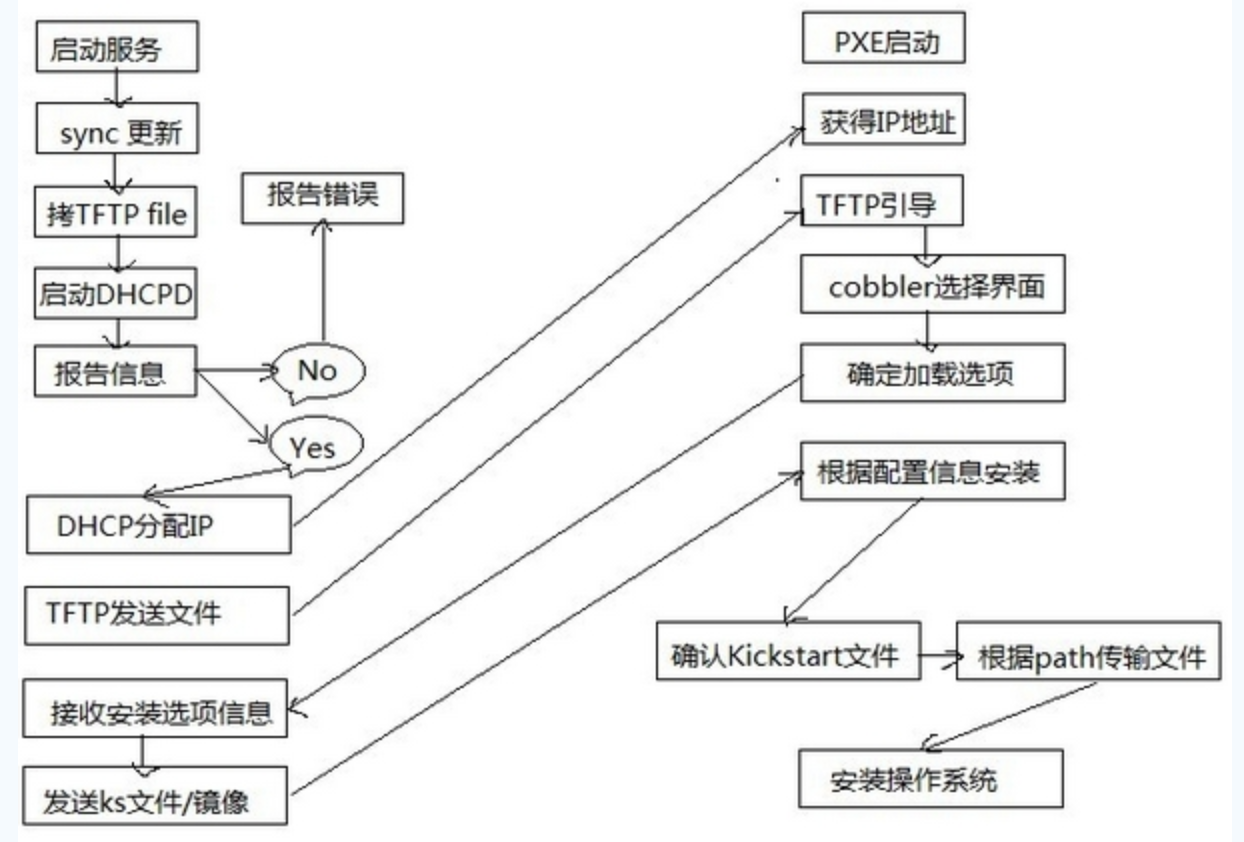
- client裸机配置了从网络启动后,开机后会广播包请求DHCP服务器 (cobbler server)发送其分配好的一个IP
- DHCP服务器(cobbler server)收到请求后发送responese,包括其ip地址
- client裸机拿到ip后再向cobbler server发送请求OS引导文件的请求
- cobbler server告诉裸机OS引导文件的名字和TFTP server的ip和 port
- client裸机通过上面告知的TFTP server地址通信,下载引导文件
- client裸机执行执行该引导文件,确定加载信息,选择要安装的os, 期间会再向cobbler server请求kickstart文件和os image
- cobbler server发送请求的kickstart和os iamge
- client裸机加载kickstart文件
- client裸机接收os image,安装该os image
3.3、Cobbler集成的服务
- PXE服务支持
- DHCP服务管理
- DNS服务管理(可选bind,dnsmasq)
- 电源管理
- Kickstart服务支持
- YUM仓库管理
- TFTP(PXE启动时需要)
- Apache(提供kickstart的安装源,并提供定制化的kickstart配置)
3.4、配置目录
配置文件目录:
/etc/cobbler
/etc/cobbler/settings : cobbler 主配置文件
/etc/cobbler/iso/: iso模板配置文件
/etc/cobbler/pxe: pxe模板文件
/etc/cobbler/power: 电源配置文件
/etc/cobbler/user.conf: web服务授权配置文件
/etc/cobbler/users.digest: web访问的用户名密码配置文件
/etc/cobbler/dhcp.template : dhcp服务器的的配置末班
/etc/cobbler/dnsmasq.template : dns服务器的配置模板
/etc/cobbler/tftpd.template : tftp服务的配置模板
/etc/cobbler/modules.conf : 模块的配置文件
数据目录:
/var/lib/cobbler/config/: 用于存放distros,system,profiles 等信 息配置文件
/var/lib/cobbler/triggers/: 用于存放用户定义的cobbler命令
/var/lib/cobbler/kickstart/: 默认存放kickstart文件
/var/lib/cobbler/loaders/: 存放各种引导程序 镜像目录
/var/www/cobbler/ks_mirror/: 导入的发行版系统的所有数据
/var/www/cobbler/images/ : 导入发行版的kernel和initrd镜像用于 远程网络启动
/var/www/cobbler/repo_mirror/: yum 仓库存储目录
日志目录:
/var/log/cobbler/installing: 客户端安装日志
/var/log/cobbler/cobbler.log : cobbler日志
3.5、命令介绍
cobbler commands介绍
cobbler check 核对当前设置是否有问题
cobbler list 列出所有的cobbler元素
cobbler report 列出元素的详细信息
cobbler sync 同步配置到数据目录,更改配置最好都要执行下
cobbler reposync 同步yum仓库
cobbler distro 查看导入的发行版系统信息
cobbler system 查看添加的系统信息
cobbler profile 查看配置信息
4、Cobbler安装
4.1 系统环境
# ip
192.168.100.202

$ cat /etc/redhat-release
CentOS Linux release 7.9.2009 (Core)

# 关闭 sedliunx
$ setenforce 0 #临时
$ vim /etc/selinux/config # 永久
SELINUX=disabled
$ getenforce # 检查
Disabled

关闭防火墙
$ systemctl stop firewalld.service
$ systemctl status firewalld.service
● firewalld.service - firewalld - dynamic firewall daemon
Loaded: loaded (/usr/lib/systemd/system/firewalld.service; disabled; vendor preset: enabled)
Active: inactive (dead)
    Docs: man:firewalld(1)
4.2 配置yum源
$ rpm -ivh https://mirrors.aliyun.com/epel/epel-release-latest-7.noarch.rpm
$ yum makecache
4.3 安装
$ yum  -y install httpd tftp python-ctypes cobbler  xinetd cobbler-web
$ systemctl start httpd
$ systemctl enable httpd
$ systemct1 enable cobblerd
$ systemctl start cobblerd
4.4 检查
    $ cobbler check

    The following are potential configuration items that you may want to fix:

    1 : The 'server' field in /etc/cobbler/settings must be set to something other than localhost, or kickstarting features will not work.  This should be a resolvable hostname or IP for the boot server as reachable by all machines that will use it.
    2 : For PXE to be functional, the 'next_server' field in /etc/cobbler/settings must be set to something other than 127.0.0.1, and should match the IP of the boot server on the PXE network.
    3 : change 'disable' to 'no' in /etc/xinetd.d/tftp
    4 : Some network boot-loaders are missing from /var/lib/cobbler/loaders, you may run 'cobbler get-loaders' to download them, or, if you only want to handle x86/x86_64 netbooting, you may ensure that you have installed a *recent* version of the syslinux package installed and can ignore this message entirely.  Files in this directory, should you want to support all architectures, should include pxelinux.0, menu.c32, elilo.efi, and yaboot. The 'cobbler get-loaders' command is the easiest way to resolve these requirements.
    5 : enable and start rsyncd.service with systemctl
    6 : debmirror package is not installed, it will be required to manage debian deployments and repositories
    7 : The default password used by the sample templates for newly installed machines (default_password_crypted in /etc/cobbler/settings) is still set to 'cobbler' and should be changed, try: "openssl passwd -1 -salt 'random-phrase-here' 'your-password-here'" to generate new one
    8 : fencing tools were not found, and are required to use the (optional) power management features. install cman or fence-agents to use them

    Restart cobblerd and then run 'cobbler sync' to apply changes.
问题1:
  $ sed -i 's/^server: 127.0.0.1/server: 192.168.100.202/' /etc/cobbler/settings
  # 修改server的ip地址为本机ip
问题2:
  $ sed -i 's/^next_server: 127.0.0.1/next_server: 192.168.100.202/' /etc/cobbler/settings
  # TFTP Server 的IP地址
问题3:
  service tftp
  {
          socket_type             = dgram
          protocol                = udp
          wait                    = yes
          user                    = root
          server                  = /usr/sbin/in.tftpd
          server_args             = -s /var/lib/tftpboot
          disable                 = no  # 修改为no
          per_source              = 11
          cps                     = 100 2
          flags                   = IPv4
  }
问题4:
  $ cobbler get-loaders
  # 这个会有问题,源文件被删了,会报错,在后面单独讲。
问题5:
  $ systemctl enable rsyncd
  $ systemctl enable xinetd
问题6和8:
$ yum -y install cman fence-agents pykickstart debmirror问题7:
  $ openssl passwd -1 -salt '123456' '123456'
  $1$123456$wOSEtcyiP2N/IfIl15W6Z0
  $ vim /etc/cobbler/settings # 修改settings配置文件中下面位置,把新生成的密码加进去
  default_password_crypted: "$1$123456$wOSEtcyiP2N/IfIl15W6Z0
重启服务并同步配置
  $ systemctl restart cobblerd
  $ cobbler sync
最后检查
  $ cobbler check
  No configuration problems found.  All systems go.
5、cobber 配置
5.1 导入CentOs-7的镜像
把共享挂载到本机,copy 镜像文件 到本机 (这个镜像文件上传可以是其他方式比如 wget、rzsz、ftp等)
$ mount //192.168.201.230/share/iso /mnt/ios  -o username=guest # 临时
$ vim /etc/fstab
//ip/sharename /mnt/ios cifs defaults,username=guest 0 0  #永久
$ mount -a
拷贝镜像文件到本机
$ cd /mnt/ios
$ cp Centos-7.9-x86_64-Minimal-2009.iso /opt

$ mkdir /opt/CentOS-7
# 挂载光盘镜像
$ mount /opt/CentOS-7.9-x86_64-Minimal-2009.iso /opt/CentOS-7
mount: /opt/CentOS-7 is write-protected, mounting read-only

# cobbler导入镜像
$ cobbler import --path=/opt/CentOS-7 --name=Centos-7.9-x86_64-Minimal --arch=x86_64

# --path 镜像路径
# --name 为安装源定义一个名字
# --arch 指定安装源是32位、64位、ia64, 目前支持的选项有: x86│x86_64│ia64
# 安装源的唯一标示就是根据name参数来定义,本例导入成功后,安装源的唯一标示就是:CentOS-7.1-x86_64,如果重复,系统会提示导入失败

# 最终文件会被导入到下面目录
/var/www/cobbler/ks_mirror/Centos-7.9-x86_64-Minimal

# 导入完镜像以后,那么就使查看下cobbler
$ cobbler list
distros:
Centos-7.9-x86_64-Minimal

profiles:
Centos-7.9-x86_64-Minimal
5.2 导入kickstarts配置文件
方式一 命令导入
$ cd /var/lib/cobbler/kickstarts/
$ vim Centos-7.9-x86_64-Minimal.cfg

install
url --url=$tree
text
lang en_US.UTF-8
keyboard us
zerombr
bootloader --location=mbr --driveorder=sda --append="crashkernel=auto rhgb quiet"
# Network information
$SNIPPET('network_config')
timezone --utc Asia/Shanghai
authconfig --enableshadow --passalgo=sha512
rootpw  --iscrypted $1$fbtuNkRK$dk12cNiON54Uz6SyZ7kaQ1
clearpart --all --initlabel
part /boot --fstype xfs --size 1024
#part / --fstype xfs --size 1 --grow
part / --fstype xfs --size 40960
#part biosboot --fstype=biosboot --size=1
part /data --fstype xfs --size 1 --grow
firstboot --disable
selinux --disabled
firewall --disabled
logging --level=info
reboot

%pre
$SNIPPET('log_ks_pre')
$SNIPPET('kickstart_start')
$SNIPPET('pre_install_network_config')
# Enable installation monitoring
$SNIPPET('pre_anamon')
%end

%packages
@^minimal
@core
%end

%post
systemctl disable postfix.service
mkdir -p /root/.ssh && chmod 0700 /root/.ssh
touch /root/.ssh/authorized_keys && chmod 0600 /root/.ssh/authorized_keys
cat >> /root/.ssh/authorized_keys <<EOF
ssh-rsa AAAAB3NzaC1yc2EAAAADAQABAAACAQC/mKOilLpZnQtil+dwqSFMPKAazGXbfymKU2bHeBka6ua0AsJL+yjg/K9dn28CAs9yX2qDDTOo+QTllp6+zcEpBBKVE34UtfUuNQKqvMIUvfKUc03lP7yhBIDmYhEcNaU3vEV6dGlHp5ISRYy7A/5HV5dcGv6sBU7UTuSjFKc2IzS148jeIiFQIV8pP8TO3WSh86CHetkI6NYWa1+ksHQWNfqJj/Fvd/oZ0YTj9csxAf0grX6csssssssssxxxxxxxxx7t/gY2CFMN7qYprYEzWVvCOO9Vn/LrUtoj6k8zqlnWxJDcinIV9xV/dgwlGtElrNbsaMvJHaMNxxxxxxxxxx5Bk9kNxjIGTkiHoh6AYRyaDrnp884FzokchPeekeujRAJRTgSUDsAaVuxF6/VyNr08KYRiFvndJm2Yw0eqMbr+DYQtsJJy5HdDbmFvjMmmQdqd5Ps3ri+lgSi1D6VArHmDC39SJ3Y/VRuDTUPth+Y8frnaNGKsTinoZ06bZgP2GveMm6u+1VF8gJcKMu3/01lSHDPILghe0mr7Wg7BWIHPsctYx1bfiaEe23Eu7qdE4gWSvFH0N3srFmDbNVxIkHDRY/xayUxcJkx/jERw8JL7SB8bhgsON4VoKZ97643YDxX+Xc/7LY6VKzUQ== xx@xx.com
EOF
%end


# 写完 ks 文件之后,先通过 validateks 测试一下有没有语法错误
$ cobbler validateks


# 编辑profile,修改ks文件为我们刚刚上传的Centos7.2-x86_64.cfg
$ cobbler profile edit --name Centos-7.9-x86_64-Minimal --kickstart=/var/lib/cobbler/kickstarts/Centos-7.9-x86_64-Minimal.cfg

$ cobbler profile edit --name Centos-7.9-x86_64-Minimal --kopts='net.ifnames=0 biosdevname=0'   # centos7 才要

# 查看导入信息及默认ks文件
$ cobbler report
方式二 web页面操作
# 这边我们用web 界面来管理

$ yum install -y cobbler-web # 我们之前以前安装了
# 备份配置文件

$ cp /etc/cobbler/modules.conf /etc/cobbler/modules.conf.back
# 设置cobbler web 密码
$ htdigest -c /etc/cobbler/users.digest Cobbler admin  # admin 用户名
输入密码

# 重启生效
$ systemctl restart cobblerd
$ systemctl restart httpd

# 访问web

https://192.168.100.202/cobbler_web

# 默认账号密码
cobbler
cobbler

# web 页面选择 Configuration -- Kickstart Templates 编辑ks
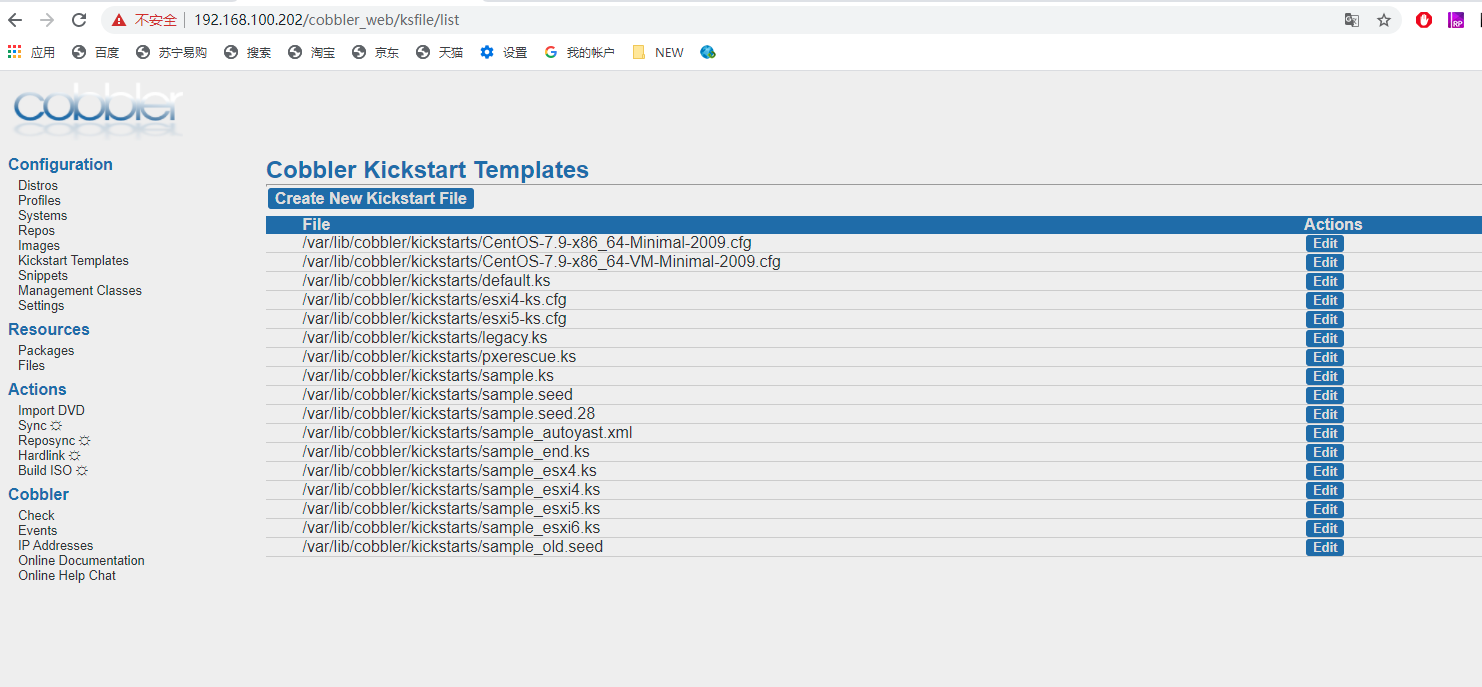
# 创建文件名字 CentOS-7.9-x86_64-Minimal-2009.cfg
install
url --url=$tree
text
lang en_US.UTF-8
keyboard us
zerombr
bootloader --location=mbr --driveorder=sda --append="crashkernel=auto rhgb quiet"
# Network information
$SNIPPET('network_config')
timezone --utc Asia/Shanghai
authconfig --enableshadow --passalgo=sha512
rootpw --iscrypted $1$fbtuNkRK$dk12cNiON54Uz6SyZ7kaQ1
clearpart --all --initlabel
part /boot --fstype xfs --size 1024
#part / --fstype xfs --size 1 --grow
part / --fstype xfs --size 40960
#part biosboot --fstype=biosboot --size=1
part /data --fstype xfs --size 1 --grow
firstboot --disable
selinux --disabled
firewall --disabled
logging --level=info
reboot
%pre
$SNIPPET('log_ks_pre')
$SNIPPET('kickstart_start')
$SNIPPET('pre_install_network_config')
# Enable installation monitoring
$SNIPPET('pre_anamon')
%end
%packages
@^minimal
@core
%end
%post
systemctl disable postfix.service
mkdir -p /root/.ssh && chmod 0700 /root/.ssh
touch /root/.ssh/authorized_keys && chmod 0600 /root/.ssh/authorized_keys
cat >> /root/.ssh/authorized_keys <<EOF
ssh-rsa AAAAB3NzaC1yc2EAAAADAQABAAACAQC/mKOilLpZnQtil+dwqSFMPKAazGXbfymKU2bHsdsdsdyjg/K9dn28CAs9yX2qDDTOo+QTllp6+zcEpBBKVE34UtfUuNQKqvMIUvfKUc03lP7yhBIDmYhEcNaU3vEV6dGlHp5ISRYy7A/5HV5dcGv6sBU7UTuSjFKc2IzS148jeIiFQIV8pP8TO3WSh86CHetkI6NYWa1+ksHQWNfqJj/Fvd/oZ0YTj9csxAf0grX6cJzonXusdsdw+ygEIUr9dssdswslNzPPS7t/gY2CFMN7qYprYEzWVvCOO9Vn/LrUtoj6k8zqlnWxJDcinIV9xV/dgwlGtElrNbsaMvJHaMNcscwMdhL31hajG5Bk9kNxjIGTkiHoh6AYRyaDrnp884FzokchPeekeujRAJRTgSUDsAaVuxF6/VyNr08KYRiFcsweqMbr+DYQtsJJy5HdDbmFvjMmmQdqd5Ps3ri+lgSi1D6VArHmDC39SJ3Y/VRuDTUPth+Y8frnaNGKsTinoZ06bZgP2GveMm6u+1VF8gJcKMu3/01lSHDPILghe0mr7Wg7BWIHPsctYx1bfiaEe23Eu7qdE4gWSvFH0N3srFmDbNVxIkHDRY/xayUxcJkx/jERw8JL7SB8bhgsON4VoKZ97643YDxX+Xc/7LY6VKzUQ== xxe@gxx.com
EOF
%end
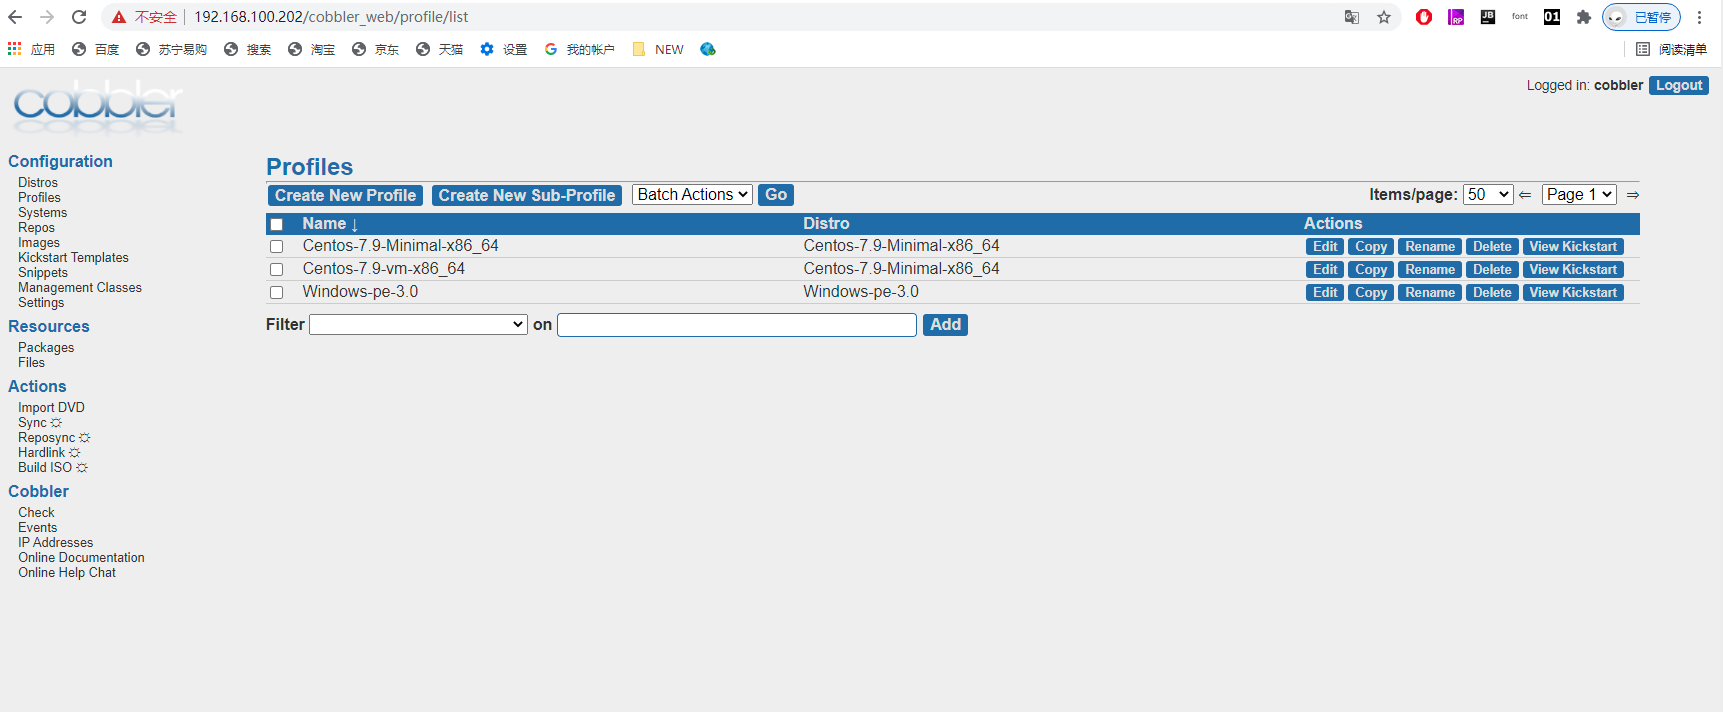
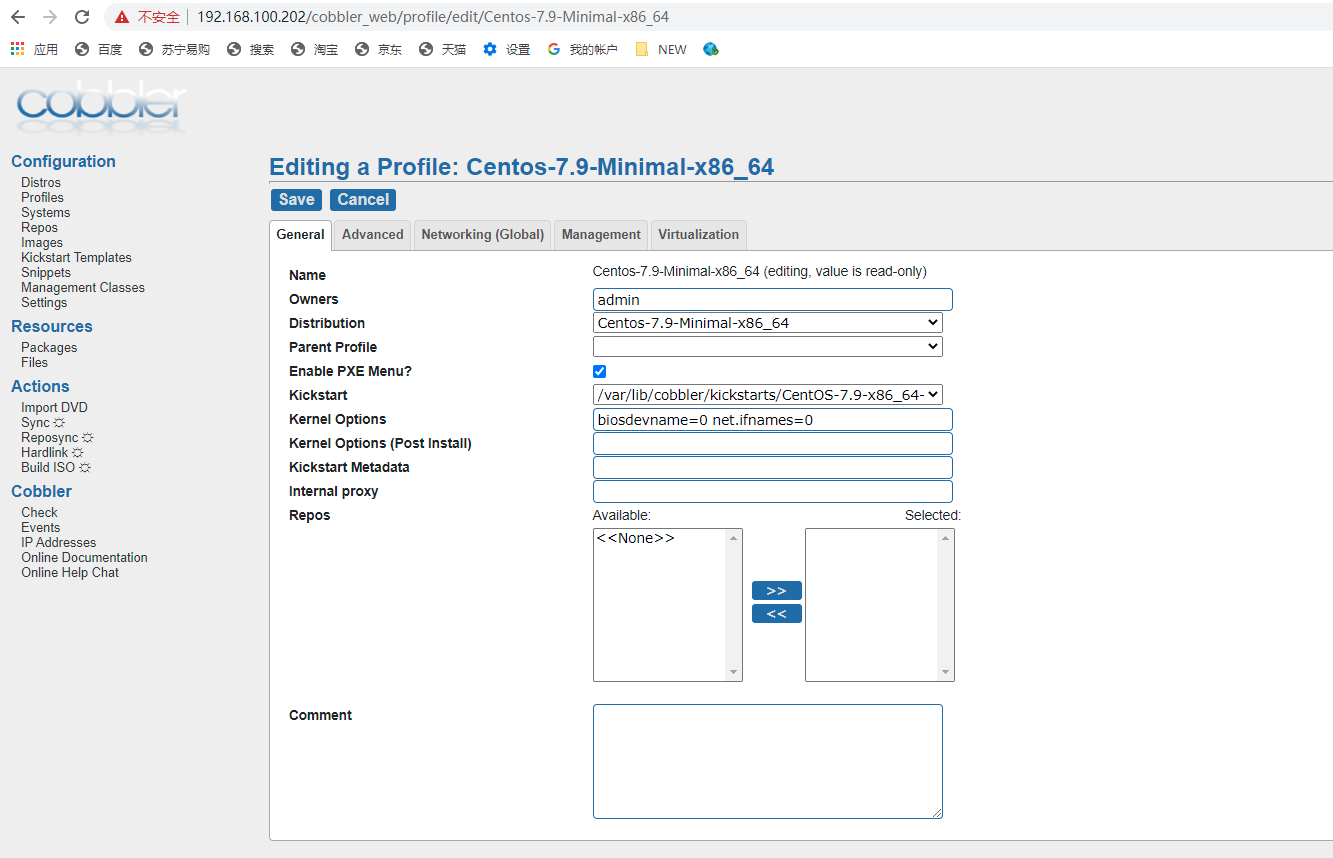
# web 页面选择 Configuration -- profile 编辑profile
错误
$ cobbler get-loaders
https://cobbler.github.io/loaders/README 这个项目没了,文件没了
自己手动安装复制

方式一
$ yum -y install syslinux
$ cp /usr/share/syslinux/pxelinux.0 /var/lib/cobbler/loaders/
$ cp /usr/share/syslinux/menu.c32 /var/lib/cobbler/loaders/
$ systemctl restart cobblerd
$ cobbler sync
# 重启生效
$ systemctl restart cobblerd
$ systemctl restart httpd

方式二
直接下载现成的,这边就不提供,需要的,私发。