Consul服务发现安装
一、安装
二进制安装
下载地址
1
2
3
| sudo yum install -y yum-utils
sudo yum-config-manager --add-repo https://rpm.releases.hashicorp.com/RHEL/hashicorp.repo
sudo yum -y install consul
|
1
2
3
4
5
6
7
8
9
| cd /usr/local/src/
wget -c https://releases.hashicorp.com/consul/1.14.4/consul_1.14.4_linux_386.zip
unzip consul_1.14.4_linux_386.zip
mkdir /usr/local/consul
sudo chown root:root consul
sudo mv consul /usr/local/consul
ln -s /usr/local/consul/consul /usr/local/bin/consul
consul --version
mkdir -p /usr/local/consul/{data,log,config}
|
配置文件
/usr/local/consul/config/server.json
1
2
3
4
5
6
7
8
9
10
11
12
13
14
15
16
17
18
19
| {
"node_name": "consul-server",
"server": true,
"bootstrap": true,
"ui_config": {
"enabled": true
},
"datacenter": "tz",
"data_dir": "/usr/local/consul/data",
"log_level": "INFO",
"advertise_addr": "{{ GetInterfaceIP \"eth0\"}}",
"addresses": {
"http": "0.0.0.0"
},
"connect": {
"enabled": true
}
}
|
报错
1
| Multiple private IPv4 addresses found. Please configure one with 'bind' and/or 'advertise'.
|
启动 consul 参数
1
2
3
|
$ /usr/local/consul/consul agent -config-file=/usr/local/consul/config/server.json
|
做成服务
1
2
3
4
5
6
7
8
9
10
11
12
13
| cat /etc/systemd/system/consul.service
[Unit]
Description=consul
[Service]
ExecStart=/usr/local/consul/consul agent -config-file=/usr/local/consul/config/server.json
ExecReload=/bin/kill -HUP $MAINPID
KillMode=process
Restart=on-failure
[Install]
WantedBy=multi-user.target
|
启动服务设置开机自动启动
1
2
3
4
| systemctl daemon-reload
systemctl start consul
systemctl status consul
systemctl enable consul
|
二、常用命令
警告:永远不要在生产中运行Consul的-dev模式。这个模式会快速启动一个单节点的Consul且不能数据持久化。
查看Consul成员信息
1
2
3
| consul members
Node Address Status Type Build Protocol DC Partition Segment
consul-server 192.168.100.200:8301 alive server 1.14.4 2 tz default <all>
|
停止Consul Agent, 使用以下指令关闭Consul Agent
附:常用的几个简单指令
| 命令 |
说明 |
| consul agent -dev |
以开发模式运行Consul |
| consul members |
检查Consul数据中心的成员 |
| consul leave |
关闭Consul代理 |
更多参数说明
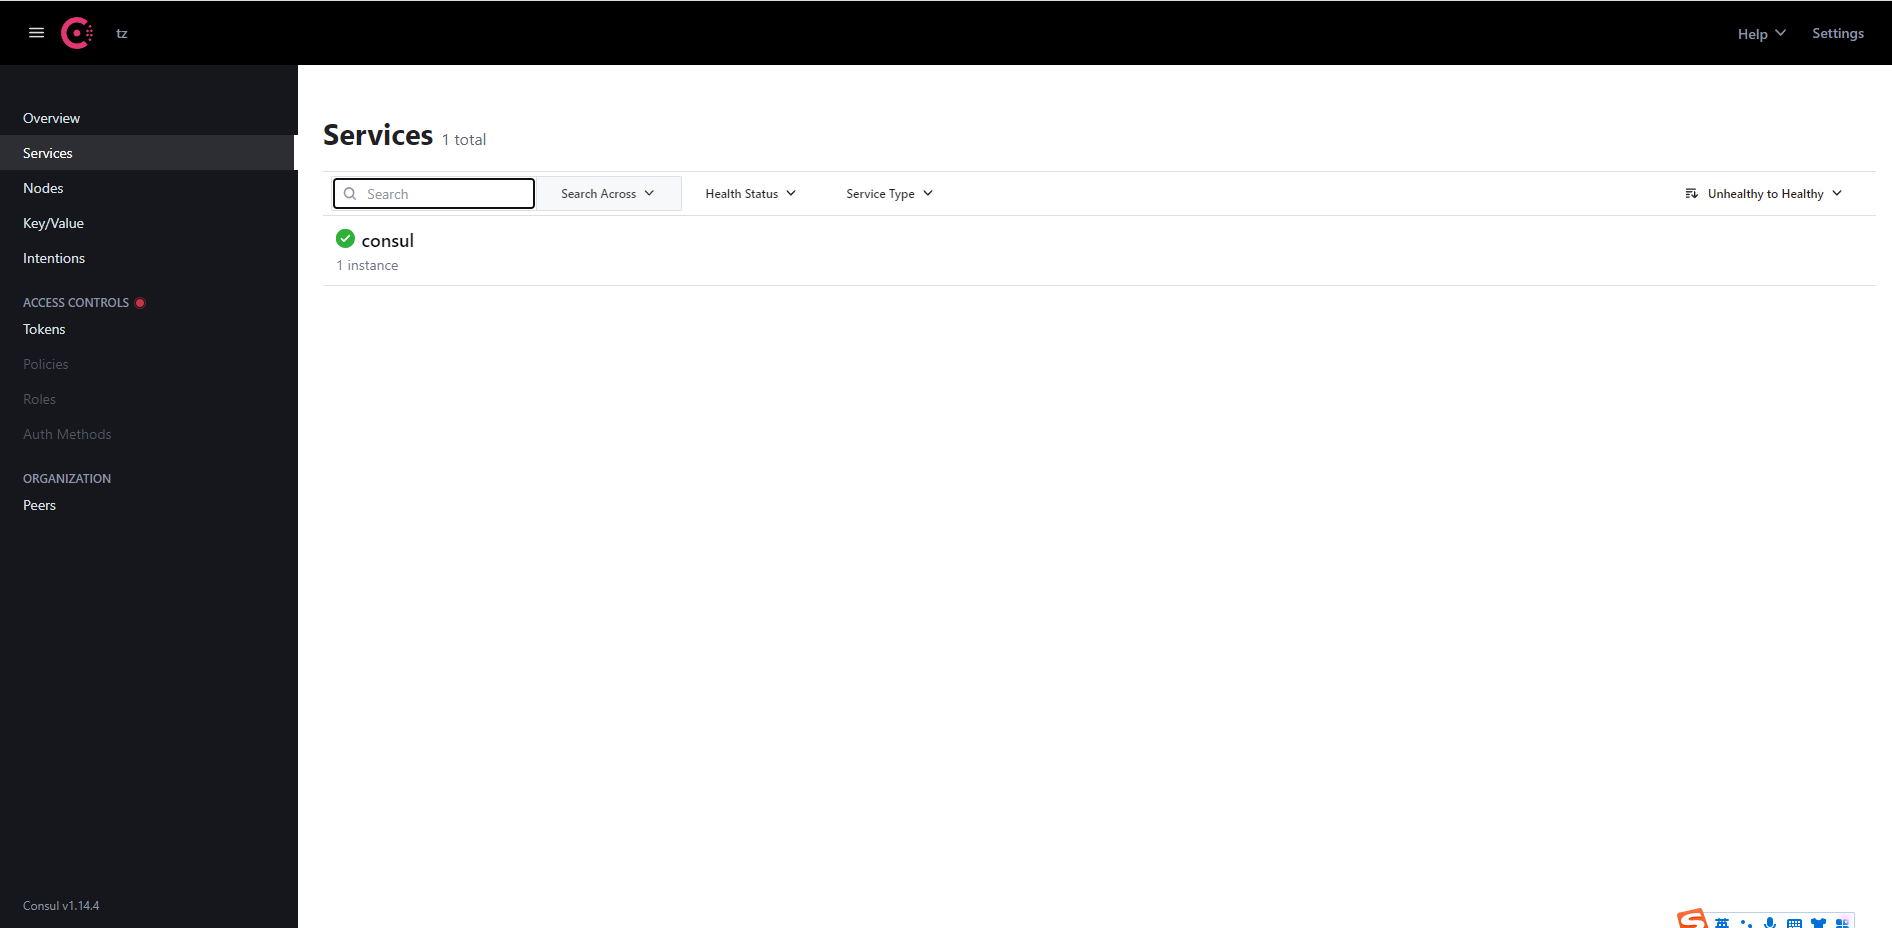
访问IP:8500/ui
三、开启ACL
配置token
ACL 管理员使用 Consul API 生成令牌并将其链接到一个或多个策略。下图说明了规则、策略和令牌之间的关系:

ACL 管理员可以创建额外的工件并将其链接到令牌,例如服务身份、节点身份和角色,使策略能够适应更复杂的需求。
3.1、启用ACLs
在配置文件中添加ACL参数,然后重新启动Consul服务可以启用ACL,为了正确启用ACL配置,用户需要将相同的参数应用于数据中心的每个服务端和客户端。如果希望减少Consul客户端的重启次数,可以在添加令牌时一同启用ACL。
1
2
3
4
5
| "acl":{
"enabled": true,
"default_policy": "deny",
"enable_token_persistence":true
}
|
注意:这里需要注意的是令牌持久化在1.4.3版本中才引入,用户在使用HTTP API时无法持久化令牌。
在此示例中,默认策略配置为deny,这意味着处于白名单模式,这里还启用了持久化令牌(token persistence),这样令牌会保留在磁盘上,并在代理重启时重新加载。
注意:如果要在现有数据中心上引导ACL,首先配置 default_policy = allow 在代理上启用ACL。默认策略配置为allow将启用ACL,打开所有权限,从而在创建并使用令牌后,集群也可以正常工作,这有助于减少停机时间。
开启后
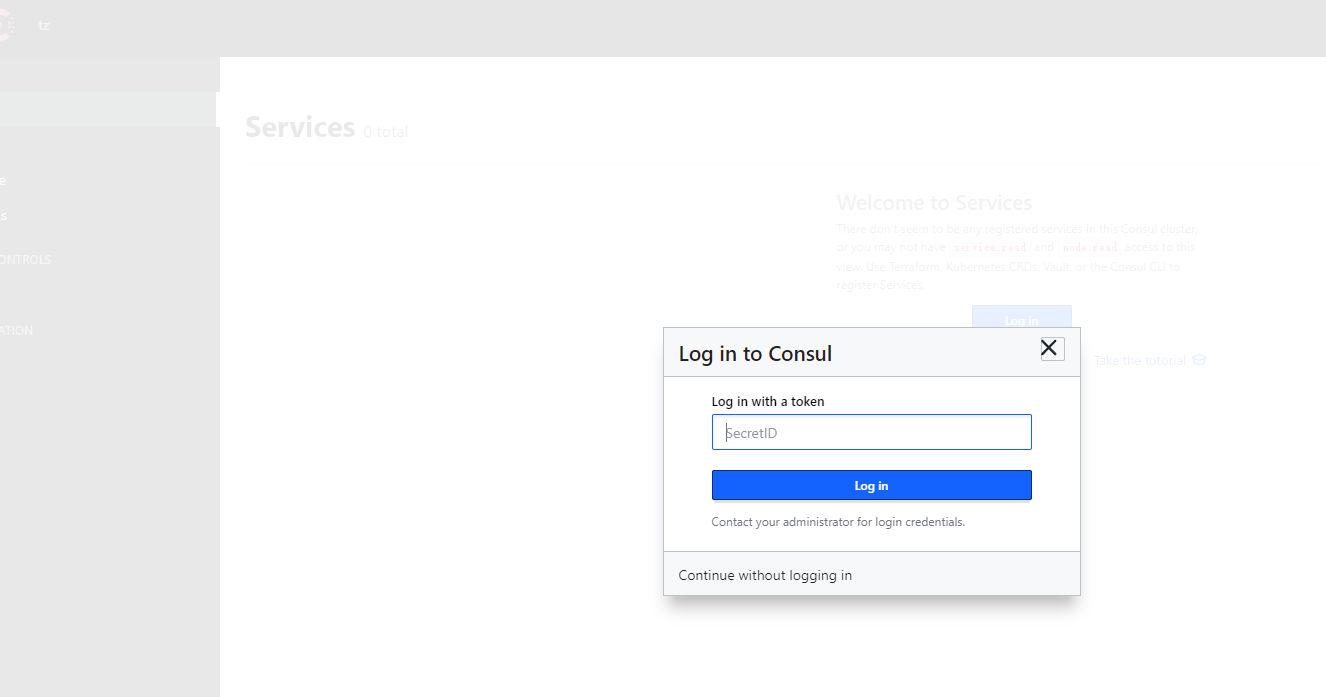
登入需要token
3.2、建引导令牌
使用acl bootstrap命令创建引导令牌:
1
2
3
4
5
6
7
8
| consul acl bootstrap
AccessorID: 149f495f-95a8-48f9-1921-a3f707e82483
SecretID: 3f7ec03b-2d16-e496-c37d-64d6b02e450a
Description: Bootstrap Token (Global Management)
Local: false
Create Time: 2023-02-24 11:09:27.70310552 +0800 CST
Policies:
00000000-0000-0000-0000-000000000001 - global-management
|
输出内容包含了令牌的重要信息:global-management和SecretID。
注意:默认情况下,Consul赋予引导令牌 global-management 策略,这个令牌拥有特权,不受任何限制。在紧急情况下,拥有一个不受限的令牌时非常重要的,但是只应少量管理员拥有此令牌。SecretID是一个UUID,在使用Consul命令行或HTTP API时用于标识令牌。
用 SecretID 就可以登入到 web 控制台了
命名上也是要带tonken 才可以访问
1
2
3
4
5
6
7
8
9
10
11
12
13
14
15
16
17
| consul acl token list -token "3f7ec03b-2d16-e496-c37d-64d6b02e450a"
AccessorID: 149f495f-95a8-48f9-1921-a3f707e82483
SecretID: 3f7ec03b-2d16-e496-c37d-64d6b02e450a
Description: Bootstrap Token (Global Management)
Local: false
Create Time: 2023-02-24 11:09:27.70310552 +0800 CST
Legacy: false
Policies:
00000000-0000-0000-0000-000000000001 - global-management
AccessorID: 00000000-0000-0000-0000-000000000002
SecretID: anonymous
Description: Anonymous Token
Local: false
Create Time: 2023-02-24 11:06:38.327664019 +0800 CST
Legacy: false
|
生成token
1
2
3
4
5
6
7
8
9
10
11
12
13
14
15
16
17
18
19
20
21
|
consul acl token create \
-description "This is an example token" \
-policy-id 06acc965
consul acl token list
consul acl token update -id 986193 -description "WonderToken"
consul acl token read -id 986193
consul acl token delete -id 986193
|
四、注册服务
注册
1
2
3
4
| curl \
--header "X-Consul-Token: 3f7ec03b-2d16-e496-c37d-64d6b02e450a" \
--request POST \
http://192.168.100.200:8500/v1/agent/service/register
|
查看
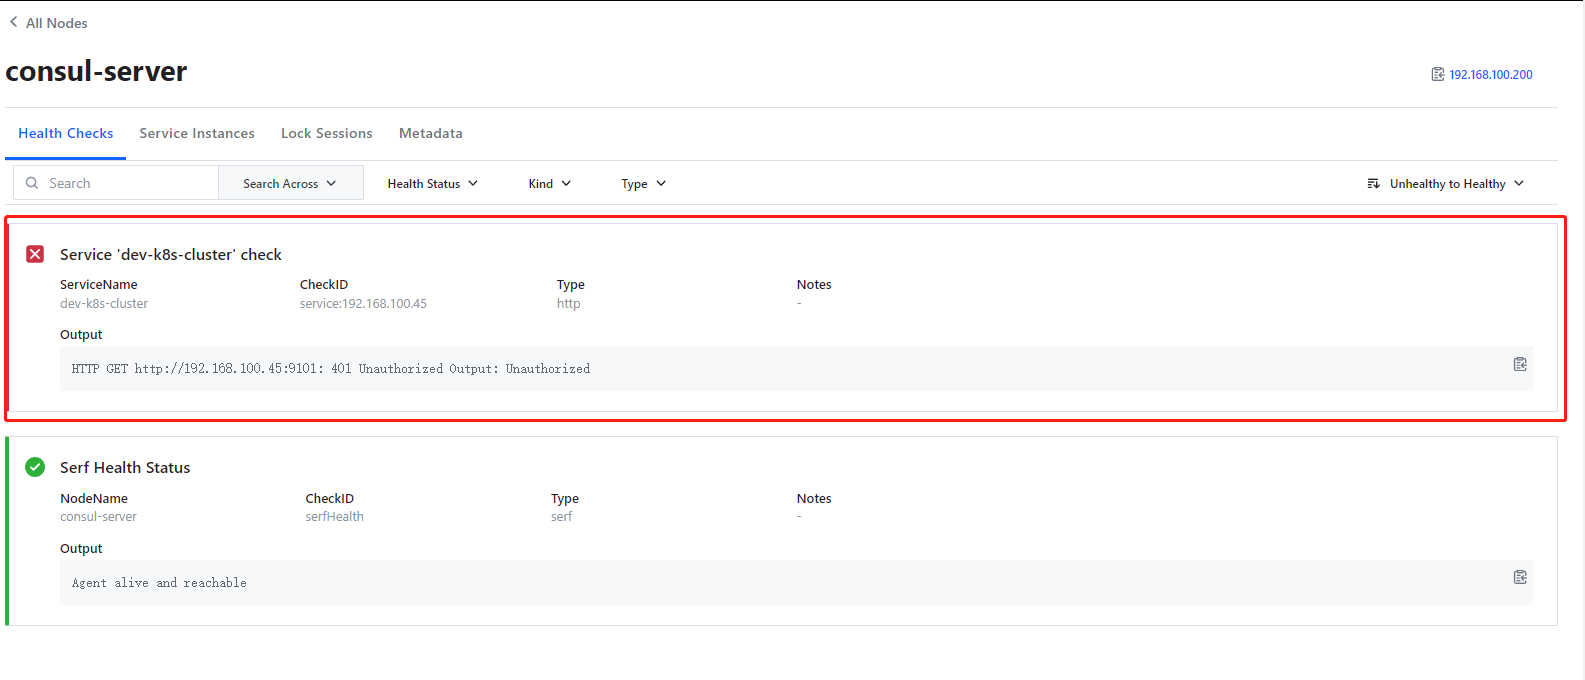
1
| curl http://192.168.100.45:9101/metrics
|
https://www.jianshu.com/p/811dae00daba
参考资料